Saturday, October 31, 2009

A (not so) spooky Halloween layout

I love this time of year . . . my girls have been busy with fun Halloween festivities at their schools and parties and they can't wait to go trick-or-treating. And I'm looking forward to capturing some great pictures of them in their costumes. The fact that there will be lots of yummy candy all around is an added bonus (I happen to have a major sweet tooth!).

Here is a Halloween layout I created with Shimmerz that was recently published in the October (and the last) issue of Memory Makers magazine. I was honored to have my page included in their very last issue.


Since no layout is complete without a little shimmer and shine, I used Coffee Shimmerz on the jagged edge of the paper to give it some extra sparkle.


Have a Happy Halloween!!!!

-Stacy Cohen

Halloween with Shimmerz


Hiya All!! Happy Halloween!! Hopefully this day is a long one because I am not ready for November 1st!! I needed to squeeze in one more Halloween card before my cute stamps are put away for good.


My image is stamped with Brilliance Graphite Black and then colored with my copics. I knew that I couldn't have a Halloween image without the sparkle so I painted the cauldron with Coal Shimmerz, the buckle on the witches hat and the pumpkin eyes with Sunflower Shimmerz, and the stems with Key Lime Shimmerz. Doesn't the Shimmerz make the image look amazing!!

So what are your costume ideas for Halloween? My kids are all very different this year, we have Wonder Woman, Bumblebee Transformer, and Minnie Mouse. I am looking forward to having a whole day to do lots of fun activities with them, they should make Halloween Saturday every year.

Hope you all have a FANTASTIC night!

Friday, October 30, 2009

Hope

I have one final project that I want to share with you this month for our "Pink Projects". This frame is what I call a labor of love, as I will be giving it to a friend who is breast cancer survivor. I love the way that the Shimmerz added to this frame in so many ways! The first thing I did with this frame is that I put chipboard letters on the frame and first sprayed with my Shimmerz Spritz in bubblegum and let it dry. While I was waiting for the color to dry, I went ahead and started painting the flowers. I sprayed green card stock with my Shimmerz Spritz in Baby's Breath, just to give a little shine to what would become my stems and leaves. Again, I set this aside, and let the card stock dry before I decided to cut and shape them. Next, I started to paint the flower heads themselves. For the one flower, I colored with my Shimmerz in Opal, and then lightly sprayed with Shimmerz Spritz in Baby's Breath to give a little extra shine to the flower head. For the Second flower, I painted with my my Shimmerz Blingz in Pink Pointsettia, and once it was dry, I lightly sprayed with Shimmerz Spritz in Truffle and Antique Lace. By this time, my frame was dry, so I went ahead and sprayed over the pink with my Shimmerz Spritz in Baby's Breath, dried it with my heat setting gun and then sprayed one more time with the Shimmerz Spritz in Bubblegum. I let all parts dry completely, and then started to assemble the pieces. For the stems I cut the card stock into 1/2" strips and then rolled them up, so that the spritzed parts and some of the plain green card stock showed through, which gave the stems a little extra dimension. I freehand cut out my leaves and then shaped them, sprayed a little more of the Shimmerz Spritz in Baby's Breath, shaped the leaves to how I wanted them, and then set them with my heat gun. I glued the stems down onto the frame with a clear glue. The flower heads were added with pop dots, to give them some extra dimension on the frame and then I added the buttons for the centers. I added some pearl bling to the word "hope" and outlined the word "hope" with a souffle pen, after removing the chipboard letters, which left the "masked" letters. Finally,k I added a little stamp which says "Trust in the lord, with all your heart and lean not on your own understanding". I LOVE the way this frame turned out, and am happy to be able to share it with you all!

And a close up of the flower heads.

Thanks for stopping by!
-Deanna

Thursday, October 29, 2009

Another Pink Project...

I know... National Breast Cancer Awareness month is almost over, and I am squeaking this project in just under the wire. I almost let the month slip away, but I really wanted to make sure to do a project to acknowledge such a great cause.

I decided to make a card... a perfect way to help brighten someone's day.


I used Shimmerz in Magenta to paint the chipboard letters and a little bit of Shimmerz in Angel Wings to shimmer up the flower. (I know it is hard to see the shimmer on the flower, so you will have to forgive me. I am still learning how to photograph these shimmery projects. ;) )


I hope this card inspires you to make your own and help to lift the spirits of someone battling this terrible disease.

Don't forget that there is still time to upload your Pink Projects using any pink Shimmerz to the Shimmerz Flickr Group. You can see more details here.

Thanks so much for stopping by!

Halloween Shiny Chocolates

Mmmm Chocolates, you do not know how much self control I had to exert to not eat all these choccies before finishing this project!

A little Halloween make (that wont make it to Halloween!) using my Shimmerz Paints.


The black paper has been sprayed with Shimmerz Spritz Licorice, the Owl painted with Pixie Dust Blingz and Coal.


Right, I'm off to eat some chocolates.
Have a yummy Thursday
Kim

Wednesday, October 28, 2009

Shimmerz Spritz - Bubble Wrap Tutorial


As promised on the video, here's what the finished project looks like. The shimmery stamped background lends interest and dimension to an otherwise plain piece of cardstock.

here's a close up of the bubble wrap impression--although shimmerz dries really quickly, you'll want to use a heat gun to dry the spritz after stamping the bubble wrap so you'll keep the nice uniform circles (well unless you're trying to achieve a different effect).

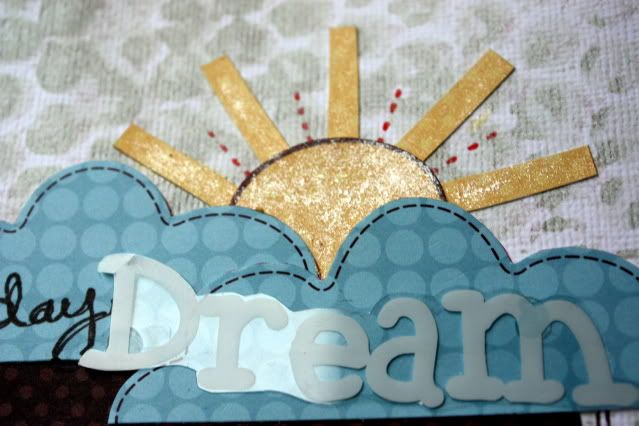
I also added some shimmerz paints to my project. Sunflower shimmerz makes this sun a little brighter!

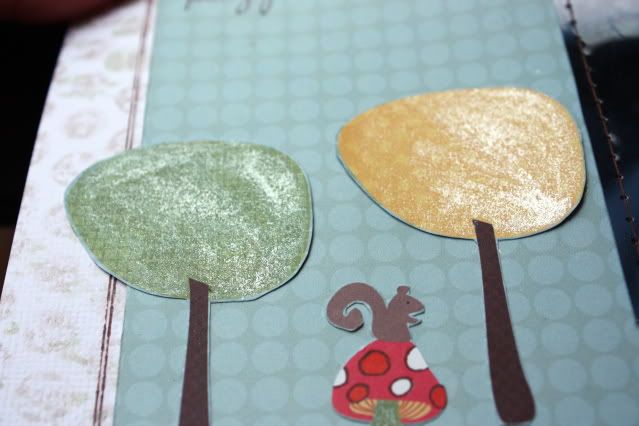
I used mossy stone and sunflower shimmerz on the tree tops for a wonderful iridescent sheen.


Thanks so much for taking the time to view the video! I hope you use this idea as a springboard for you own! Have a great day!
Tanisha

A little more pink

I wanted to post another pink layout before the month comes to an end. Here's a page I made featuring a special picture of my "sleeping beauties." The journaling reads: One night when Daddy was out of town, I let you girls sleep in bed with me. I caught this special moment when you two were sleeping in the same position facing each other. Your bodies formed a perfect heart. Even when you’re sleeping, you girls are magically connected . . . heart to heart.


I used Spritz to dye the Prima flowers -- Bed of Rose for the pink one and Sea Foam for the blue one. I painted the chipboard alphas and the edges of the leaves with Hi Ho Silver Shimmerz.


The papers and the chipboard circle and stars are from Bo Bunny. I covered the chipboard circle with vintage glitter glass.

Sleep tight tonight and don't let the bed bugs bite!!

-Stacy Cohen

Tuesday, October 27, 2009

Gesso and Shimmerz - a beautiful combo!

Hey, it's Lucy with some messy fun - gesso, Shimmerz and crumpling!! I was working with the Earth Love line from Cosmo Cricket and wanted to create a textured background to my layout. Here's how I did it:


I dry brushed over the background paper with gesso and let it dry. Then misted with Licorice Spritz and Baby's Breath Spritz for a pearly irridescence. Crumple the paper while it is still damp with the Spritz and let it dry for a gorgeous, textured effect!


A simple easy way to spice up your next project!

Have a great week!

Lucy

Monday, October 26, 2009

Shimmerz+Printer= Happy Pictures!

Soo did you know that you can actually use Shimmerz paints on your photo paper and get some seriously cool looks?! Surprise! You can. It just takes a little patience and a light hand with a paint brush.

I had this random idea pop into my head when thinking about the amazing colors of fall and wanting to make the most most of them.

Using a piece of HP Premium Glossy photo paper and Shimmerz Blingz in Gold Glimmer, I lightly brushed with even strokes, the entire background of the photo paper. This is where it is a bit tricky, you don't want to get TOO much paint on your paper, otherwise it takes a while to dry BUT you also don't want to be going back and forth over your paint strokes either or you will end up with uneven strokes and smears. So find a nice balance in between.

Now you can just leave the background as/is. or get a little bit more funky and paint the edges as I did here with Eucalyptus. AND then you can have your child decide she wants to be a part of it as mine did, spread a good ol Antique Lace smear right in the middle while your momma isn't looking. LOL


It is important to allow your paint ample time to completely dry. Then print your picture as per usual, right over the top of it. It adds so much POP to the colors, you won't believe it! And though it is hard to grasp with a camera, trust me the look is incredible!


While you are at it, you should grab your Spritz and add some beauty to those Prima's you have in bulk!

Here is my completed layout:

Just think of the possibilities that you have here with your Shimmerzy photos now!!! Use light colors, dark colors, go wild and crazy with your spritz for a graffiti look. Try it out and see what you think!

Sunday, October 25, 2009

Hi!
 Leslie here....
inviting you to step out of your comfy zone. Out of your box...and into
a new world of polka dots. Polka dot palooza as a matter of fact....
this video will show you how you can use Shimmerz on something you use
everyday around your house..foil.  ;D  I hope you enjoy my polka dot
technique:


and here is my fnished layout:


Up close the foil circles really look like stained glass art. 
This is a fun and easy project
to do. 
Here's a few up close and personal shots:


(you can click on them to make them larger to see the details)
I hope you enjoyed this education video.
Get out there and inspire the world with your
polka dot palooza.
Have a great day!
~Leslie Ashe~

CPS -Shimmerz Grow Card

Hi Everyone,
I'm Maggie Lamarre with the Education team. I'm excited to be here with you as we showcase the fun sketch from Card Positioning and the magic of Shimmerz.
Have you been having fun looking at all the awesome tutorials and inspiration so far?
Grab your  cuppa joe and get comfy for a very very short tutorial, so don't blink :)

I'm an advocate for simple cards specially with the Holiday looming so so soon. This year I said to myself I'm going to get organized and get all my cards mailed out by Nov 26th. I'm very proud of myself for starting this early :)


Supplies:

Marks Paper Company English Garden, Making Memories Metal sentiment, Basic Grey Rhinestones, Jenni Bowling Bingo card, Offray ribbon.Tag. Shimmerz Bamboo Leaf, Bed of Roses, Chik-A-Dee, UHU Glue, Gartner studio cardstock.

How to:

1. Spritz all 3 Shimmerz on non-porous surface then drag the tag onto the surface, then redo 2 times, let dry, drag again by smearing any edges that didn't get saturated.
2.Cut the pattern paper 5x3.5 and distress the edges,adhere to the base.


3.Loop ribbon thru the tag and distress the edges, adhere to the pattern paper.


4. Spritz Chik-A-dee onto the bowling card let dry for 2 mtes or use a heat embossing gun.
5.Adhere the rhinestone to the card then add the Sentiment to the bottom.


Voila you are done in less than 7 mtes :)

Here it is again :)


We would luv to hear from you, leave a comment and let us know what some tricks you have used to make creating faster?

Have a fabulous week,
Maggie

PS don't forget to sign up to be a follower to be the first to know all the happenings on the blog :)

Saturday, October 24, 2009

Candy... Anyone??!!!

Hi guys! With Halloween around the corner, I wanted to share this fun treat holder idea with you. It's been boy approved by my 3 1/2 year old, who had complained, that I was only making "girl stuff" for Halloween! So, with that in mind I made this monster, for my little monster !!! :)

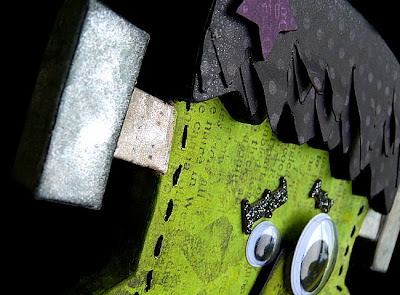
It's true, even Frankenstein can appreciate a little bit of sparkle! The bolts seen below, were covered with patterned paper then sprayed with Baby's Breath Spritz. The spritz really brought the bolts to life with a more metallic look.


Here's a punch-out that I used to embellish the box. I added Pixee Dust Blingz to the crescent shape, for some added texture and sparkle.


The chipboard letters here (the a, n, d and y) were covered with patterned paper also and then painted with the same Pixee Dust Blingz.

Supplies:
Shimmerz Paints - Pixee Dust Blingz and Baby's Breath Spritz.
Pink Paislee - Patterned papers, rub-ons, chipboard letters, punch-outs and glittered chipboard.
Other - Wood monster cut-out, eyes, box and embroidery floss all from Hobby Lobby.

To see how to put the box together you can go to the Pink Paislee blog here.

Have a safe and fun Halloween!!! :)

Jennifer

Shiney, Sparkly Halloween

What are you making for Halloween? We don't really celebrate Halloween in the United Kingdom the same way that you do in America but it has been getting more popular over here so I thought I would make a sparkly Halloween card to start the season off.

The stamps are from Hero Arts and I've used Shimmerz Paints Coal to add sparkle to the little owl's cloak.


Hope you are having a spook-free Saturday
Kim

Friday, October 23, 2009

A bit of masking fun!

So the fabulous Miss Jeni and I have this little challenge called {644.5}. Whenever inspiration hits, we challenge each other to create something wild, crazy or cra(x)y in some cases and to just scrap from the heart.

A few weeks back we scrapped a JUST SAY NO! layout. And of course, I couldn't resist a little Shimmerz fun on my layout.


The whole basis of the layout was formed around wanting to create a really cool title that would get my point across. I used some plain chipboard letters and arranged them on my cardstock background. Using one of my favorite colors right now (Shimmerz Spritz Eucalyptus) I simply sprayed over the top of my letters and onto the page until I achieved the look I was going for.


Then I lifted off my chipboard letters to reveal the white cardstock from behind. To add another element of interest to my title, I wrote my journaling across the top of it.


One of my other favorite techniques when using Shimmerz Spritz is to combine and overlap colors. I used the Eucaplyptus and Tuscan Sun and the color that they create together is this fabulous green!

My finished layout looks like this:

Now I would send you over to Jeni's blog to check out her amazing layout BUT...she got her's picked up for publication by Scrapbook Trends!!! How cool is that? Congrats to you Miss J!

I challenge YOU to go create a fun title using the masking technique today and see what kind of amazing layout you come up with!

Thursday, October 22, 2009

CPS - Christmas

Hey All, Here is my card for the CPS and Shimmerz Paints challenge this week.


I've used Shimmerz Paints Spritz Baby's Breath on the music stamped background and Shimmerz Paints Fire Engine Red and Wed wagon on the BasicGrey alphas.


The Holly leaves were sprayed with Shimmerz Paints Olive Branch Spritz and then painted with a bit of Mossy Stone.


Have a Shiny Holly Leaf Thursday
Kim

CPS #138 and Shimmerz

Hi, Daniela here, with my take on CPS #138 sketch. I made this card with polka dot paper that I made by stamping and embossing. The background is Crate Paper and then I used a journaling note, for my butterfly and the sentiment.I die cut the butterfly from old book pages using my Cuttlebug die. I sprayed the butterfly with Licorice Shimmerz Spritz and then painted with December Sky Blingz, Golden Wheat and Bubble Gum Shimmerz. I used a heat gun to set each color before moving to the next color.
The journaling note is sprayed with Tuscan Sun, Sea Foam and Licorice Shimmerz Spritz.
Thanks for stopping by. I hope you get a chance to play.